


Isn't that the sweetest piece of writing? Not only are these kids lucky to have such wonderful families, but I am the luckiest teacher to have them in my class!
Now, let's take a look at our Pirate day, ARRGGG ye ready me hardies?

What an amazing time we had! The children were immersed in the world of mapping by imagining themselves as pirates. The children came fully dressed in pirate attire and I must say, if they were real pirates, they would be feared for their cuteness.


We created many charts on Pirates, as well as discussed Pirate lingo (talk). The children became so engaged that all day they were squinting with one eye and saying "arrrrgggg" and "shiver me timbers". We read many stories and learned about how to use compasses and maps. The children put their knowledge to use when we went on a class treasure hunt through the school. Of course, our treasure hunt just wouldn't be complete without mustaches and eye patches for all. The children had to follow directions based on clues that were placed in different spots around the school. The class was broken into three small groups for their treasure hunt. A huge thanks to Mrs.Hyland and Mrs.Ali for all of their help and support on this exciting day!


As the children were going through their treasure hunt, they had specific rooms they had to find. They were to write down the name of the location and the community helper (teacher/librarian/principal etc.) in charge.


After our mapping hunt, the last clue brought us back to our room where a special treasure awaited on "X" marks the spot. Inside the treasure box were rings (suckers) and mini compasses. The children were also rewarded with gold ice cream cones (orange sherbert). I must admit, this was one of the best teaching experiences I have ever had! I had just as much fun as the children following clues and using our mapping skills.


Here is a little Pirate info. I also learned during our study.
Why do Pirates wear eye-patches?
No, regardless of the idea of missing eyeballs, they actually serve another specific purpose. Eye-patches were used for helping Pirates see in the dark. It takes an average human eye about 25 minutes to change from bright sunlight to seeing in the dark. If a pirate had to go under the deck, where it is usually very dark, it would take a long time to adjust his vision. The eye-patch would be used so that when they went below deck, they would swap the patch from one eye to the other and see with the eye that had already adjusted to the dark conditions. They would then be able to see their surroundings quickly. This is one idea for why pirates wore patches over their eyes.
We tried this idea out in our classroom one day and believe it or not, it actually works. We made the classroom very dark and adorned one eye with a patch. After a few minutes we switched the patch and....voila....we could see clearly. 'Eye' wouldn't have believed it myself without trying it..
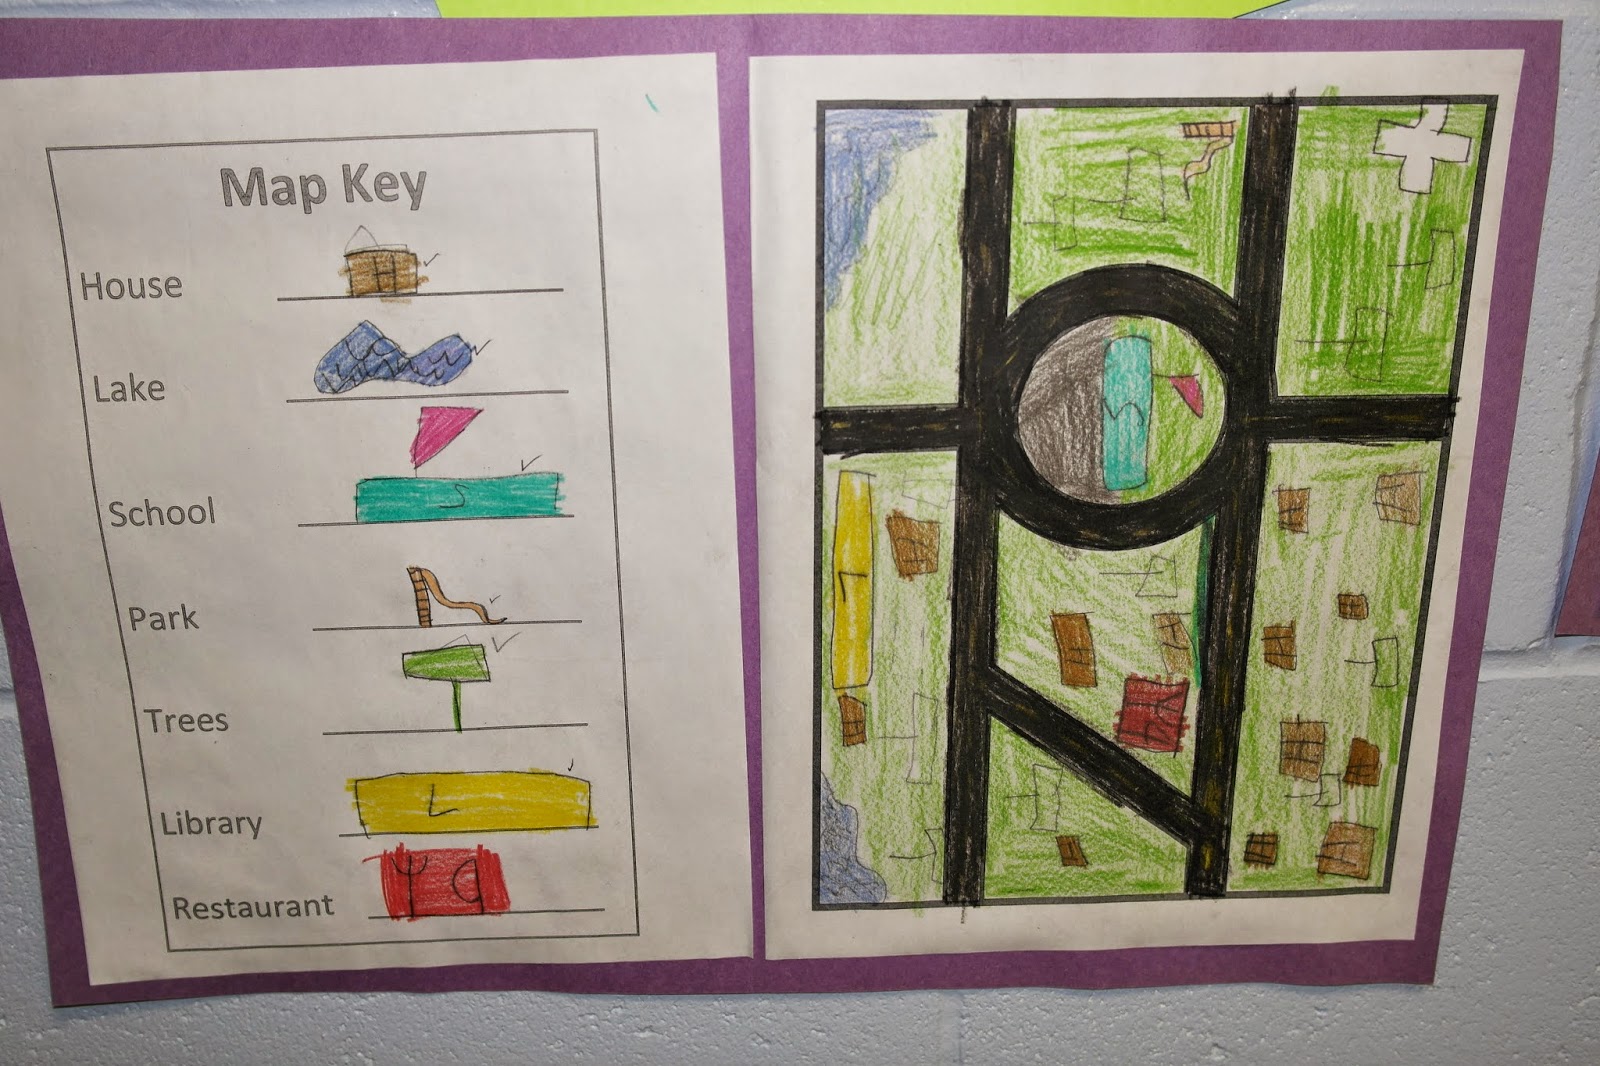
We continued our mapping studies by making individual community maps. The children created map keys using their own symbols and coloured their maps based on physical land features and buildings. They also learned about the compass rose, as well as, scale.


Bag #1 Beans Bag #2 Flour

Bag #3 Shredded paper Bag #4 Cotton

Bag #5 Marbles Bag #6 Pom poms
One at a time, we dropped each bag from shoulder height to see if Humpty would survive the fall. Look at the expression on this little one's face before the drop. During this 'egg'speriment, the children had to make predictions prior to each drop and then record the results.


The little girl above was so excited that she literally jumped out of her chair.

Cotton

Pom poms

Shredded paper ( Just a small egg shell shave )

Marbles ( It's no yoke, this egg broke )

Beans ( A little bruised but very egg-cited to have survived )

Flour ( One happy little egg )
Introducing.....
Walking on Eggs or Eggshells

Materials:
4 dozen eggs ( raw )
plastic to cover the floor (yes, I was a little unsure of the outcome...just in case precaution)
'egg'cited volunteers
Step one: remove socks and shoes
Step two: make sure every egg is free of flaws or small chips
Step three: turn every egg so that the pointed end is facing up
Step four: place one foot flat and spread out on top of the first carton of eggs ( a helper is important for balance at this stage )
Step five: continue walking across each carton with a flat foot
Step six: stand in amazement at your achievement
Here is a short video clip of our class walking on eggs. Even our principal (Mrs.Walters) and another grade 1 teacher (Ms.Renouf) joined in on our experiment.
What is your prediction?
Can you believe the strength that lies within these eggs? We talked as a class about how when there is more than 1 egg (such as a dozen) they become stronger. This brought us into comparing eggs and working as a team in our classroom. There is more strength when we all work together ( 1 plus another = teamwork (STRENGTH). The science behind this experiment is mostly based on the shape of the egg. The top and bottom of the egg are much stronger and can take more pressure. If you would like to learn more about this experiment and why it worked you can check out the following link Steve Spangler Science.
One final activity that I wanted to share with you was combining math and art to demonstrate symmetry. The children were given Miras and had to draw the missing side to each egg design. Wow! They did a fantastic job and coloured so neatly. They quickly caught on to the concept of symmetry.


I will share about our butterfly symmetrical art in another post. Thanks for stopping by and please visit again soon.